
My New Widefield Travel Rig
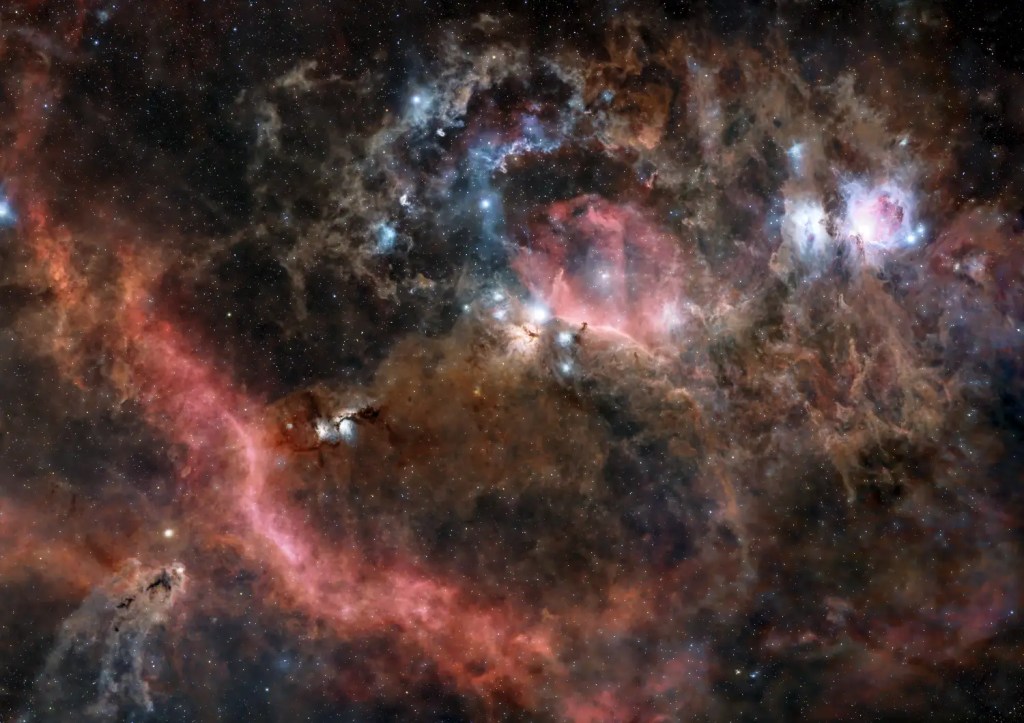
I’m excited about modern widefield travel rigs because they potentially have the power to reveal the Orion Spur – the mini spiral arm which we belong to – something that I’ve never seen, but I think in order to do that I’ll probably need to tweak my set up and go for a lens rather than a telescope to get a wider field of view. Maybe you’ll beat me to it!
All astro rigs are a combination of telescope, camera and mount. To hit the astrophotographical sweet spot each component has to compliment the other. Working out what goes with what is not hard. In this case I chose the camera and the mount to compliment the optics whilst keeping the bank manager relatively happy.
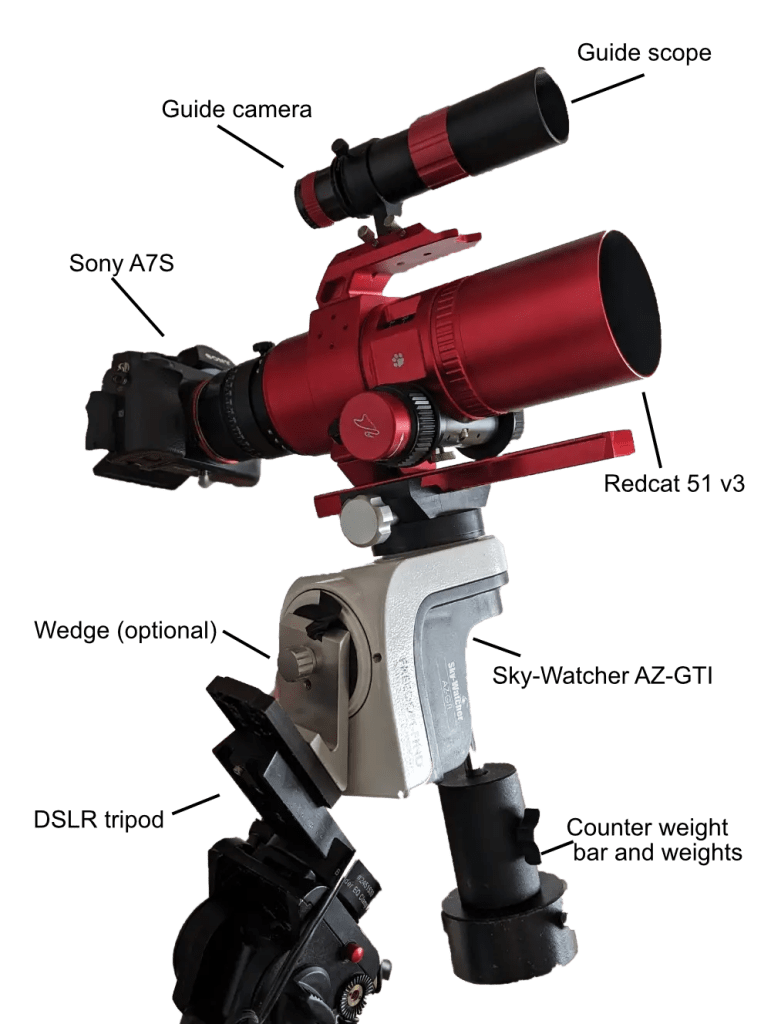
The Redcat 51v3 has a focal length of just 250mm. That means if the mount doesn’t do a supersonic job at stopping the earth from spinning we probably won’t notice as we’re not zoomed in enough to see the blurring. So to keep the bank manager happy I felt it wascompletely fine to go for a modest and small sky-watcher AZ-GTI mount (actually it wasn’t completely fine more on this later). Despite not being zoomed in the Redcat telescope is very sharp and its Petzval lens design gives the Redcat a beautifully large flat field. To make the most of the flat field I really wanted to use a camera with a large full frame sensor. The most affordable full frame sensor is a second hand Sony A7s. The pixels on this camera are large (7microns I think) which unfortunately doesn’t make best use of the telescope’s sharpness. A 3-4 micron pixel camera would be better but I can’t afford one (maybe you can so I’ve put links to the best there ones below). Anyways there are also advantages to having a camera with large pixels… for a start you’re even less likely to notice the blurring caused by having a cheap mount which doesn’t completely stop the earth spinning because the large pixels give you less resolution (I know my glass is definitely half full🤣) As I’m using the telescope’s flat field to do a 4 panel mosaic the final image will have the same resolution as a camera with 3-4 micron pixels anyway. Also this camera’s large pixels help to make it one of the most light sensitive dslr’s on the market even though it came to market over ten years ago. All in all we can live with the large pixels.
The Optics
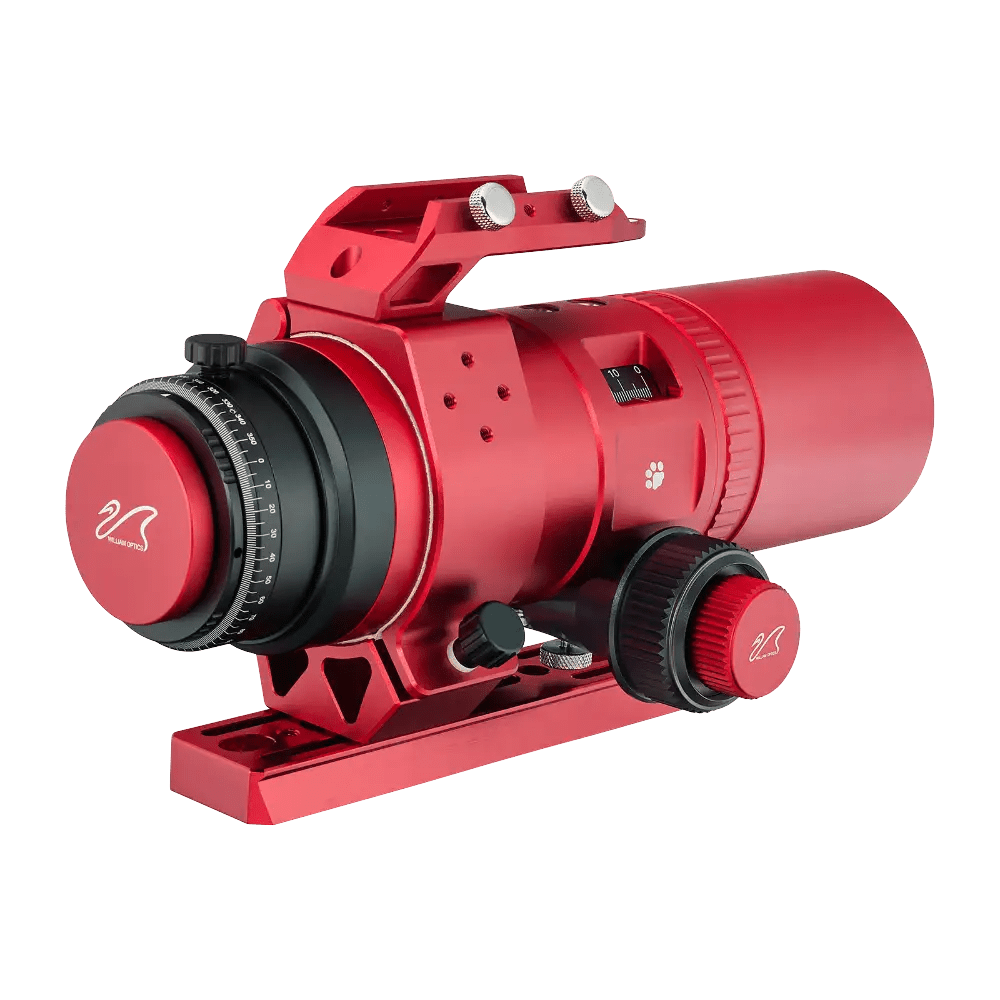
William Optics RedCat 51 WIFD
I’m impressed with this Redcat. It’s killer feature is its beautifully flat field which allows me to join together panels together to create a mosaic and that in turn allows me to cover a larger part of the sky. It’s also very sharp, well made and easy to use. Its quality.
My affiliate link
(You won’t find a better price)

My affiliate link
(You won’t find a better price)

My affiliate link
(You won’t find a better price)

My affiliate link
(You won’t find a better price)


Sigma F1.4 50mm art Lens
I love my Sigma f1.4 50mm art lens. It is so fast and sharp it can catch Orion nebula setting through the trees with just a ten second exposure. Perfect for timelapse…

The Mount:
I wanted this rig to be easy to set up and I didn’t want to bother with computers or guiding. The obvious choice for this kind of set up would be the Sky-Watcher Star Adeventurer GTI (see below) but I don’t own one so instead I went for my cheaper Sky watcher AZ-GTI. This fantastic value mount is a pain in the behind to use! I only recommend this mount for nerds who have time on their hands to hack the mount to turn it from its native alt-az mode and into an equatorial mount. You then need to stick it onto a tripod and roughly polar align it by pointing the telescope at the north star. I didn’t bother polar aligning any better than this. I think having polar aligning a bit off with this set up is no bad thing as it makes the camera slowly drift across the target which helps reduce the camera’s fixed pattern noise. Annoyingly despite bumping up the input voltage with a converter from 12v to 13.8v my AZ-GTI couldn’t manage 2 minute exposures. At this focal length my previous AZ-GTI which never fully recovered from getting toppled by Storm Barra was able to do 2 minute exposures. It seems these mounts are a bit hit and miss. To make this mount perform much better I would need to attach a guide camera and guide scope and hook the whole thing up to a computer but like I said I wanted an easy set up… so instead I just did 1 minute exposures. BTW Keeping the exposure down to 60 seconds helps ensure that the stars stay sharp despite the drift due to my rough polar alignment. As I said this mount is for nerds only… and without a guide camera it can be a bit hit and miss. I think there are better options which I’ll list below
Under $300
Sky-Watcher Az-GTI
An extremely powerful, little and affordable mount (but to get the best out of it you need to be extremely geeky). I talk more about this mount here.
PROs
- Cheap
- Surprisingly good at tracking especially in eq mode when guiding.
- Super Portable
- Has GOTO function via phone app
- Can connect to a computer via wifi allowing the use of serious and powerful astrophotography software like Nina
CONS
- Is intended as an ALT AZ Mount. In order to make it work in EQ mode you need to install firmware and cobble together a suitable mount which can be polar aligned.
- No polarscope
- Need to acquire counterwieght and counterweight shaft.
- Complicated
- Can only carry small scopes
- Needs a sturdy tripod.
AZ GTI Mount comes as an Alt Azimuth mount. You’ll need to convert it into EQ mode.

My affiliate link
(You won’t find a better price)
My affiliate link
(You won’t find a better price)
My affiliate link
(You won’t find a better price)
My affiliate link
(You won’t find a better price)
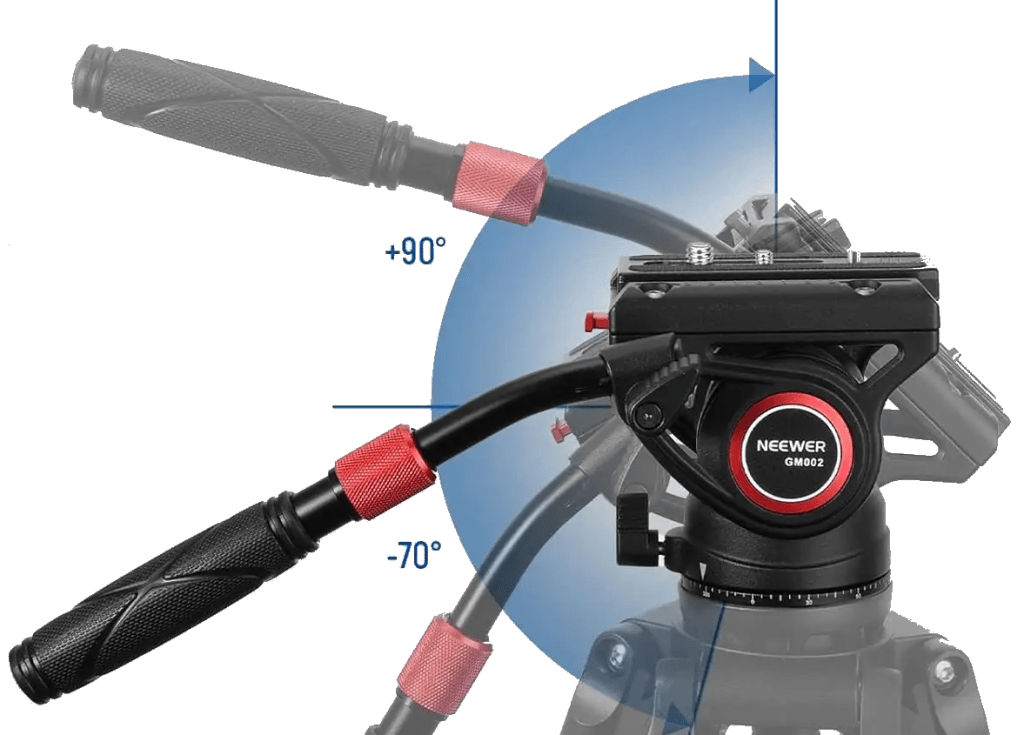
Rather than use a wedge to point the mount at the North Star I simply used my camera’s tripod head
A better option
Star Adventurer GTI
The Star Adventurer GTI does everything you need straight out of the box without all the messing around that is necessary with the AZ-GTI… but its twice the price.

My affiliate link
(You won’t find a better price)
My affiliate link
(You won’t find a better price)
My affiliate link
(You won’t find a better price)
My affiliate link
(You won’t find a better price)
The ultimate portable mount
ZWO AM3
This is the best portable mount on the market right now. It can handle telescopes far bigger than the Redcat, it can guide with sub arcsecond accuracy and its as light as the other options… if you want the best this is it.

My affiliate link
(You won’t find a better price)
My affiliate link
(You won’t find a better price)
My affiliate link
(You won’t find a better price)
The best mount if you shoot with lenses

Sky Watcher Star Adventurer Pro Pack
This is the easiest to use tracking mount on the market. It works perfectly with camera lenses. What blows me away is that these little mounts track as accurately as mounts that cost twice as much. Note this version comes with all the accessories you need although if you’re doing wide angle stuff with lenses then you might also want a ball head
My affiliate link
(You won’t find a better price)

My affiliate link
(You won’t find a better price)
My affiliate link
(You won’t find a better price)
My affiliate link
(You won’t find a better price)
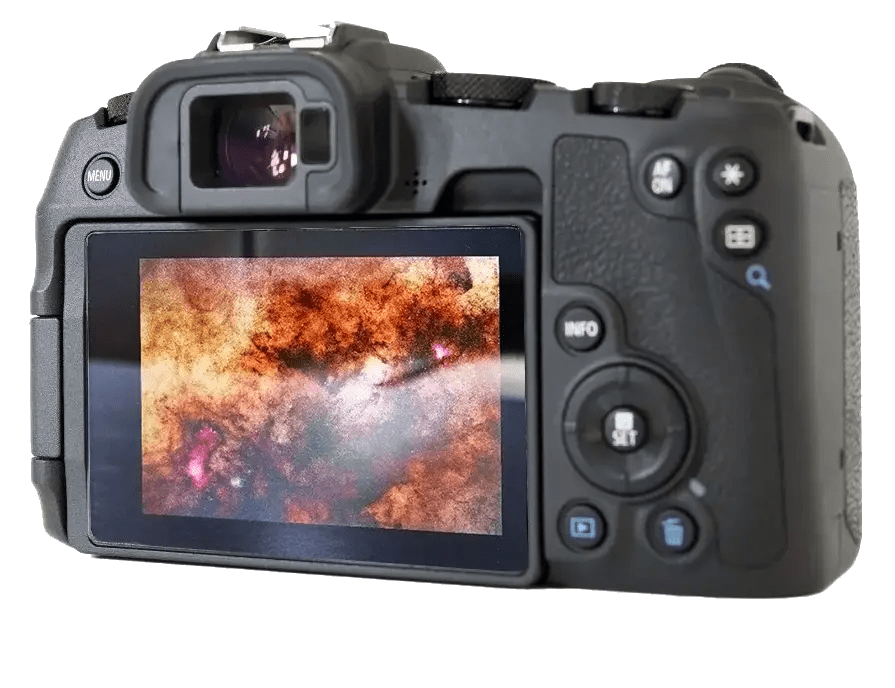
The Camera
A full frame camera is a critical component of this rig. The best value for money full frame camera for astrophotography is the Sony A7s. These are currently going for about £350 on ebay. I was brave and removed the IR cut filter from mine. I’m not going to recommend you do this as there is quite a high chance that you will ruin the camera. Also removing the ir cut filter not vital for this kind of shot. The procedure is important when using light pollution filters which rely heavily on being able to see the deep reds emitted by hydrogen gas but from a dark site like La Palma where you are receiving plenty of photons from the across the entire spectrum removing the IR cut filter is less important. There are DSLR astro cameras available that come with the IR filter removed straight out of the box.
Modified full frame DSLR
Some companies are now selling pre modified DSLRs. These are great for getting into astrophotography as they allow you to take pictures of space without the need for lugging around laptop and powersupply and all the other things that make this hobby so hard!
My affiliate link
(You won’t find a better price)
My affiliate link
(You won’t find a better price)
My affiliate link
(You won’t find a better price)
Full frame astrocamera – WOW
If I had the money I would go for a full frame mono astrocamera. I have an apc sized astro camera from QHY which is awesome. For about £4k I could own the full frame version. I think that the results with this rig and that camera would be incredible. In fact if any manufacturer is reading this wants to send me a full frame astro camera for astrobiscuit endorsement please don’t hold back🤣. Unlike DSLR’s astrocameras require the use of a computer so the whole set up becomes less grab and go. Also mono sensor cameras are even more expensive than they first appear because you need large filters and a filter wheel and they are more of a pain to run and process but wqhen you know what you’re doing the results from a mono astro camera cannot be bettered.

My affiliate link
(You won’t find a better price)
My affiliate link
(You won’t find a better price)
My affiliate link
(You won’t find a better price)

See Also…

Best Value Telescope for Astrophotography

Your First Astrophotography Rig

Incredible Budget Telescopes


